Architecture Overview
Introduction
Setup
Presenting products
Understanding prices
Managing checkout
Saleor CLI
ISR for E-Commerce
Real-time Search with Typesense
Pagination
The products query from the Saleor API returns a paginated collection. Once we receive the query result, we also have the data to ask for the next elements in that collection. In order to keep track of the position in the collection, we need a pointer, commonly known as a cursor. The query result must provide such a cursor in the response once it returns so that we can ask for another subset of data.
It's not a good idea to keep this information within the entity itself as it's unrelated to the business model. For that, we introduce a layer of indirection. In GraphQL, this layer is usually known as edges.
Let us now go through the process of adding pagination to our storefront.
- Adapt the query for fetching products so that it can be paginated. Open the
graphql/queries/ProductFilterByName.graphqlfile and update its contents with the changes below:
# graphql/queries/ProductFilterByName.graphql
query ProductFilterByName(
  $filter: ProductFilterInput!
  $sortBy: ProductOrder
  $after: String
) {
  products(
    first: 4
    channel: "default-channel"
    filter: $filter
    sortBy: $sortBy
    after: $after
  ) {
    edges {
      node {
        id
        name
        thumbnail {
          url
        }
        category {
          name
        }
      }
    }
    pageInfo {
      hasNextPage
      hasPreviousPage
      startCursor
      endCursor
    }
    totalCount
  }
}
We are not only returning the product node, but also the totalCount and pageInfo with hasNextPage / hasPreviousPage helpers to check if there are elements after and before the current collection subset along with startCursor / endCursor that uniquely identify the current subset of product collection.
Additionally, the products query has the after argument that takes the value of startCursor and endCursor as input.
-
Run the
generatescript in your Terminal or have it run in thewatchmode, as described in the previous sections. -
Update the
ProductCollectioncomponent by adding the pagination as a Fetch More button.
// components/ProductCollection.tsx
import React from "react";

import { Product, useProductFilterByNameQuery } from "@/saleor/api";
import { Pagination, ProductElement } from "@/components";

const styles = {
  grid: "grid gap-4 grid-cols-4",
};

export const ProductCollection = () => {
  const { loading, error, data, fetchMore } = useProductFilterByNameQuery({
    variables: {
      filter: {},
    },
  });

  if (loading) return <p>Loading...</p>;
  if (error) return <p>Error</p>;

  if (data) {
    const products = data.products?.edges || [];
    const pageInfo = data.products?.pageInfo;
    const totalCount = data.products?.totalCount;

    const onLoadMore = () => {
      fetchMore({
        variables: {
          after: pageInfo?.endCursor,
        },
      });
    };

    return (
      <>
        <ul role="list" className={styles.grid}>
          {products?.length > 0 &&
            products.map(({ node }) => (
              <ProductElement key={node.id} {...(node as Product)} />
            ))}
        </ul>
        {pageInfo?.hasNextPage && (
          <Pagination
            onLoadMore={onLoadMore}
            itemCount={products.length}
            totalCount={totalCount || NaN}
          />
        )}
      </>
    );
  }

  return null;
};
There are a couple of changes here. First of all, we add the Pagination component that is responsible for displaying the Fetch More button and handling the request for more data in the product collection. Then, we use Apollo's fetchMore helper method to construct the onClick event handler. This helper accepts the same variables as the auto-generated React Hook itself. As we request the next elements in the collection, we set the after argument to the end cursor (the last element) in the current subset of the product collection. Finally, we conditionally display the Pagination component depending on the value of pageInfo.hasNextPage.
The Pagination component is straightforward. We have a button with the passed in handler attached to the onClick event along with the information about the current count and total count.
- In the
componentsfolder create a new file calledPagination.tsxand copy/paste the code below:
// components/Pagination.tsx
import React from "react";

const styles = {
  nav: "my-8 flex justify-center flex-col items-center",
  info: "text-sm text-gray-500 mt-2",
};

interface Props {
  onLoadMore: () => void;
  totalCount: number;
  itemCount: number;
}

export const Pagination = ({ onLoadMore, itemCount, totalCount }: Props) => {
  return (
    <nav className={styles.nav}>
      <a onClick={onLoadMore} className="button">
        Load More
      </a>
      {itemCount && totalCount && (
        <div className={styles.info}>
          {itemCount} out of {totalCount}
        </div>
      )}
    </nav>
  );
};
- Export the
Paginationcomponent fromcomponents/index.ts:
// components/index.ts
export { ProductCollection } from './ProductCollection';
export { Layout } from './Layout';
export { ProductElement } from './ProductElement';
export { Pagination } from './Pagination';
- Lastly, we must define the type policy for the
productsquery. Inpages/_app.tsxwhile defining the Apollo client instance, we communicate to the Apollo cache that theproductsquery has the Relay style pagination. Open_app.tsxfile and update its contents with the changes below:
// pages/_app.tsx
import type { AppProps } from 'next/app'
import { ApolloProvider, ApolloClient, InMemoryCache } from '@apollo/client';
import { relayStylePagination } from "@apollo/client/utilities";

import '../styles/globals.css';

const client = new ApolloClient({
  uri: "https://vercel.saleor.cloud/graphql/",
  cache: new InMemoryCache({
    typePolicies: {
      Query: {
        fields: {
          products: relayStylePagination([]),
        },
      },
    }
  }),
});

export default function MyApp({ Component, pageProps }: AppProps) {
  return (
    <ApolloProvider client={client}>
      <Component {...pageProps} />
    </ApolloProvider>
  )
}
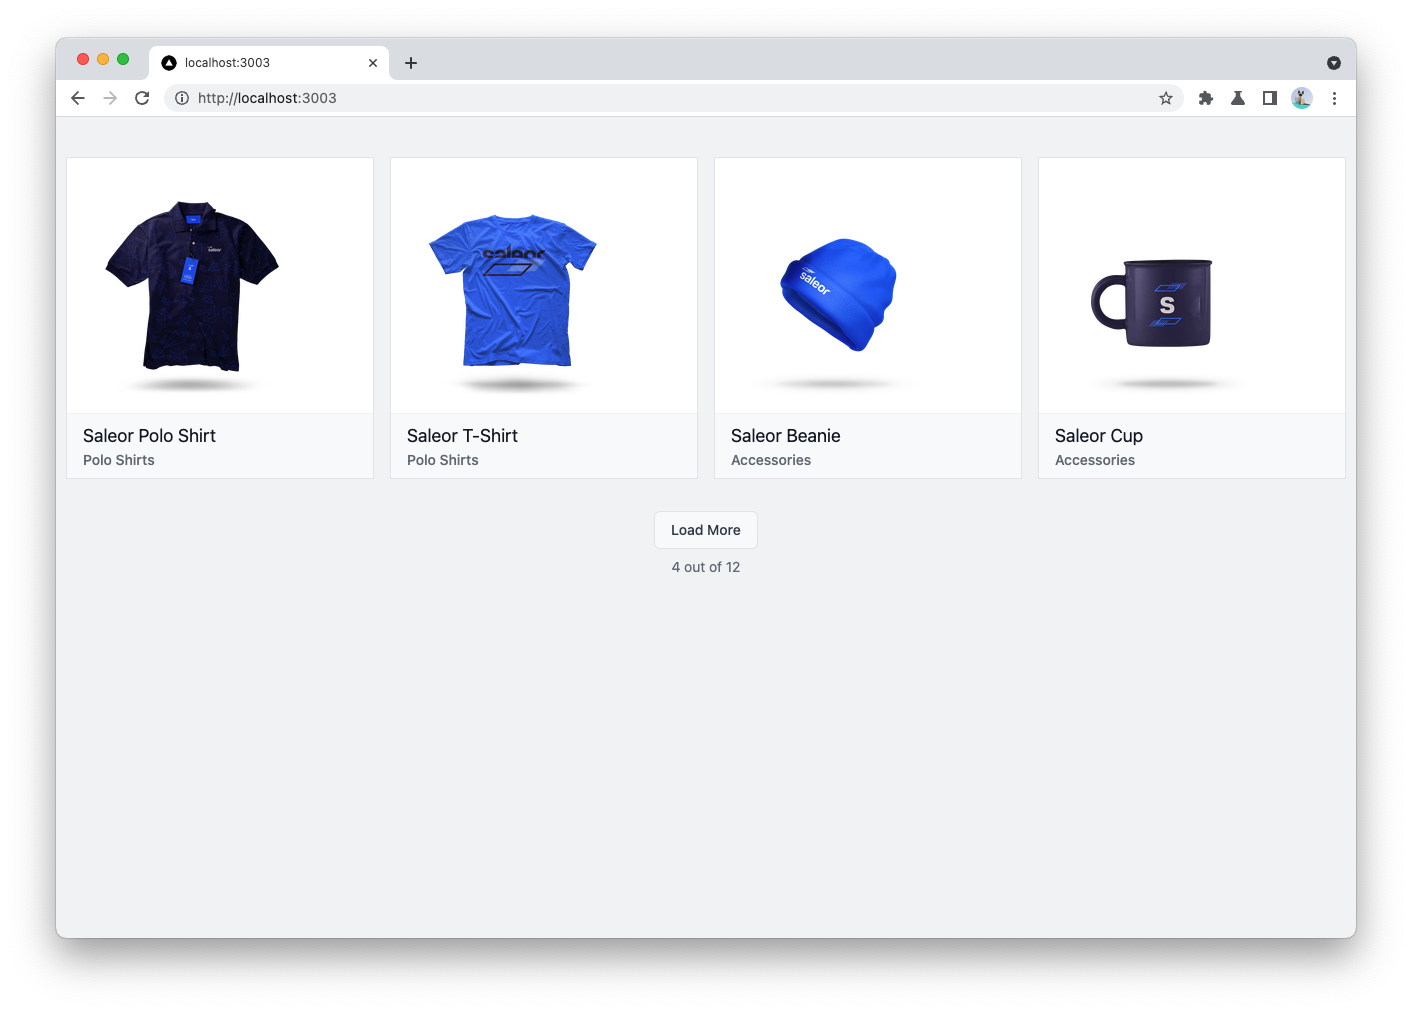
We end up with the following page that displays four products along with the button to fetch more; once the button is clicked, four more products will be displayed: